
I recently started working on building up content for our new SEO client KA Intimacy.
While optimizing the blog page, I considered adding a table of content to make it easier for users to navigate to different sections of the blog post they're interested in.
Of course, Shopify has some limitations, take a look at this article why I think Shopify is only good for ecommerce.
Shopify is meant to be a selling platform, not content management. And putting a blog on a subdomain was not something we wanted to do.
So while looking through Google to see if anyone in the Shopify community had any luck with implementing a table of content feature easily. I came across a post on the Shopify Community page about a user by the name of Cardboardcat who was fed up with paying for a table of content plugin so decided to create his own.
Unfortunately, this wasn't the type of tool we were looking for.
Why?
Based on the video on the table of content generator page, it would look like you'd have to manually do this for every blog post, and go through old ones to add it in.
Also, this would create extra code within each editor that can become a bit messy.
This would lead to time consumption and is not something I want to do for every blog post I have.
I tested out the tool and it worked great.
But I needed something that will do it automatically without injecting any extra code into the editor, and without having to individually add it to every article, new or old.
And if I ever need it removed, I can remove it from a single file, whereas the tool by Cardboardcat will need it removed manually for each blog post.
Finding a Solution
So obviously it seems like no one has an easy free table of content solution or plugin that can be used for a Shopify store.
I figured I can take some time out of the day to find a way to quickly put something together.
Well, a few hours had passed by while I tried coming up with conditional statements using Javascript.
Finally, I remembered that the same content management system that I use for my clients automatically generated ID's to heading tags based on the text inside.
This gave me an idea of using anchor linking ID's to create same-page linking.
To summarize..
I plan on using Javascript to loop through the article page to find specific heading tags. In my case, it'll be H2 tags, then add the ID to those heading tags to make an anchor link smooth scroll to that specific section.
This will allow all existing and new blog posts to automatically generate a table of content based on existing H2 tags.
Also, I should note, this code is not perfect. This code only targets your H2 tags.
Why?
Because as someone who works in the SEO and web development field, we're taught that having only one H1 tag is the best practice for search engines to understand your page.
Google has also recommended only having a single H1 tag, your title. But has ensured that having multiple H1 won't hurt your rankings.
Let's get to work.
Making Theme File Changes
I'm using the Dawn 2.0 theme, Shopify's most flexible and fastest theme that was released last year.
We need to find the file that generates the entire article. NOT the list of blogs. So be careful when making any changes to your files. Luckily Shopify has a backup where you can revert files to a specific timeline.
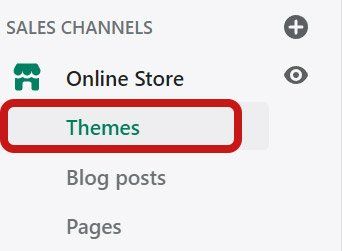
To edit the code of the website, you'll want to navigate to the tab that says Online Store, under Sales Channel.
Locate the button that says Action and click on Edit Code. You may be presented with a warning about editing your theme files so make sure you have a backup.
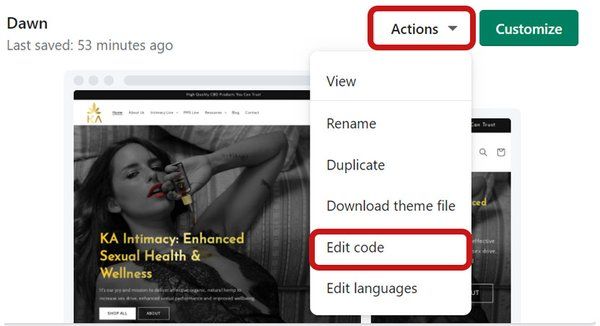
This will then take you to the main code editor for Shopify.
Modifying the Main Article Template
The template file we're looking for is in the Section folder. For the Dawn theme, it's called main-article.liquid.
If you're not familiar with liquid code, it's fairly easy to skim through to get an idea of where to paste the code that I have.
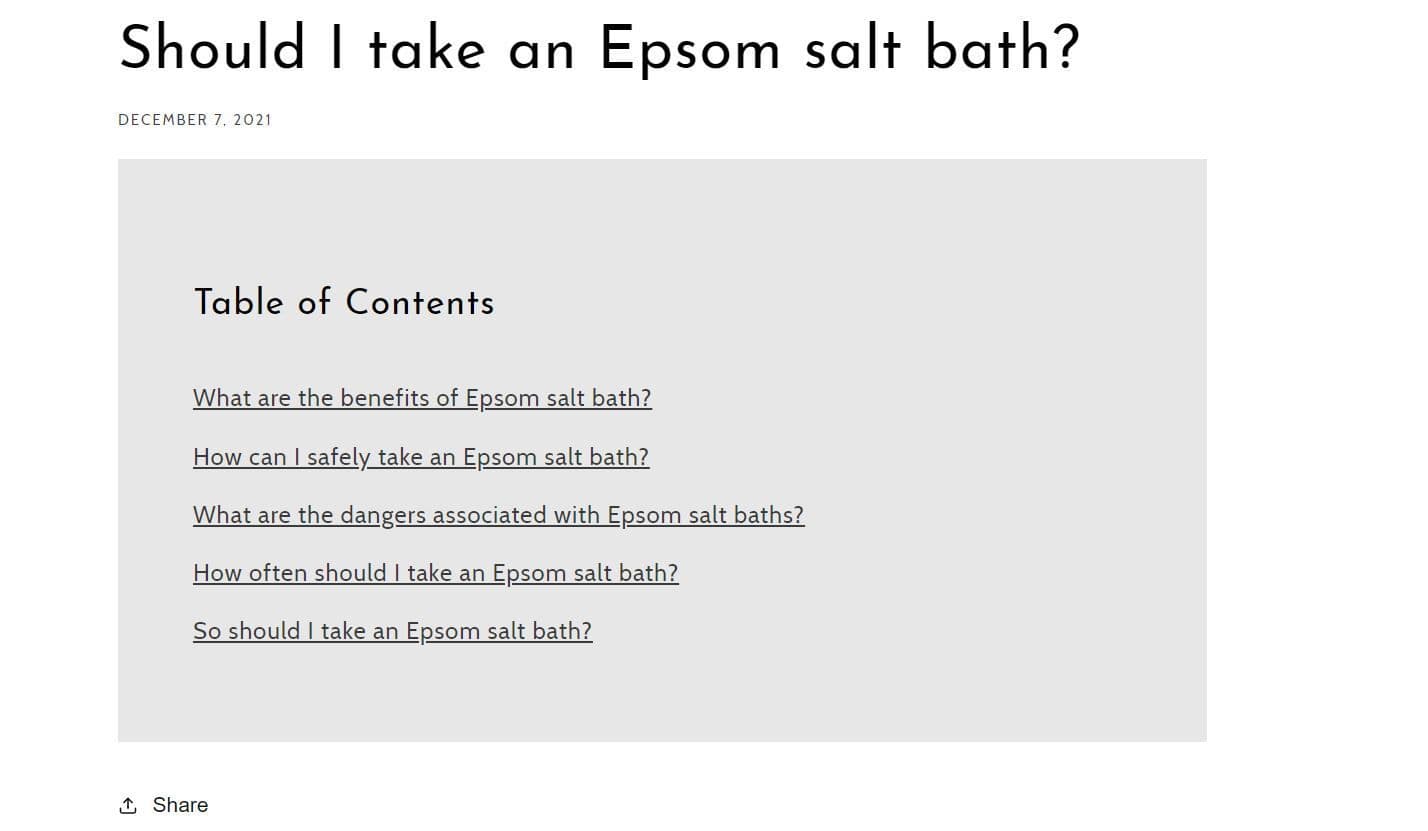
For KA Intimacy's website, I wanted the table of content below the title of the blog. The title was wrapped in the header tag highlighted in yellow.

Now, below the tag, I paste in my HTML code.
<div class="page-width page-width--narrow"> <div id="toc"> <h4 class="h2">Table of Contents</h4> </div> </div>So what does this code do?
The main container with the class of page-width and page-width-narrow ensures that I keep the same container width as my blog posts so the layout doesn't appear broken.
You may need to adjust the classes if you're using a different theme.
The div with the ID of toc is where the table of content will be generated using Javascript.
The h4 tag with the string Table of Contents is the title and is optional, name it whatever you need to but table of content makes sense.
Generating the Table of Content
I'm going to be adding the javascript snippet in the same file because I don't want this code to run on any other page.
So adding it only to the main-article.liquid file will only have this Javascript code run within the blog article page.
Here's the javascript code that will make the magic happen
This piece of code can go at the end of the file after the schema tag. I tested this out and works perfectly.
IMPORTANT: This javascript code is only targeting h2 tags. So any blog content that has h2 tags will automatically generate the table of content.
<script> var headers = document.querySelectorAll("#MainContent h2"); headers.forEach(function(header) { header.id = header.textContent.replace(/\s/g, "-").toLowerCase(); heading2 = header.textContent; var tocContainer = document.getElementById("toc"); var anchor = document.createElement('a'); anchor.setAttribute('href', '#' + header.id); anchor.innerText = heading2; tocContainer.appendChild(anchor); }); </script>My preference, I like to have it right after the closing article tag.
So a quick summary of what this code does.
the variable headers grab all the H2 tags that are wrapped in the #MainContent parent element. This prevents the code from grabbing any other h2 elements that are outside your article.
For example, some themes may use H2 in the footer or header.
How do you know?
When you save the file and refresh your blog post, you'll see the generated table of content. If you see an anchor link that doesn't sound like it should be in your blog post, chances are it pulled from somewhere else.
If it does, you may need to adjust the #MainContent and find the ID to work with your theme.
I then ran it through a foreach function, this loops through, grabbing all the H2 tags, and adding in the ID attribute of what the H2 tag says, at the same time, lowercasing it, removing any white space, and replacing it with a dash.
Here's an example.

Now it will create an anchor link based on the text of the heading tag and also a link that will jump to a specific section based on the ID in the article.
The issue is that it jumps very suddenly to the section and this can be bad for the user experience.
So let's fix that with a little bit of CSS.
Styling the Table of Content
If you're familiar with CSS, this shouldn't be too hard. You can now take control of how your table of content looks throughout your blog article.
Here's the basic code that I use for a simple styling of the table of content
html { scroll-behavior: smooth; } #toc a { display: block; } div#toc { background: #e7e7e7; padding: 50px; } div#toc a { color: inherit; margin-bottom: 10px; }Not too bad right?
This can be added to a CSS file.
The smooth scroll will give the user a better scrolling experience when clicking on the links on the table of content.
I gave it a simple background color of a light gray tone.
Lines 4 to 6 makes sure the anchor tags are displayed in separate lines.
Troubleshooting
I came up with this in a few hours and did rapid testing on it and everything seems to work smoothly.
The only downside I see is that it will ONLY target H2 tags.
If you have an H2 tag and then an H3 tag, only the H2 will be targeted and put into the table of content.
I also tested by editing existing H2 tags on previous blog posts, and the javascript will still pick it up.
The table of content is responsive and does not run into any issues on mobile.
Smooth scroll behavior may not work on some browsers and devices since it's still fairly new.
Final Words
A table of content is great for providing an easy user experience for your readers. By providing your users with information to quickly jump to sections that interest them, it can increase dwell time.
This will increase SEO on a website by making your content more accessible to visitors.
I hope this article allowed you to implement a table of content to your blog article on Shopify.
Let me know if this has worked for you. If it has, please share this article with others.
If you can improve the script, please do and I will update it.
If you would like to take a look at how I implemented the table of content for my client. Check out her KA Intimacy blog.